Tuesday, June 26, 2012

Job to Import Vendor/Customer Postal Address in Dynamics Ax2012

static void PostalAddressCreate(Args _args)
  
   {
  
     VendTable vendTable;
  
     DirParty dirParty;
  
     DirPartyPostalAddressView PostalAddress;
  
     CommaTextIo file;
  
     container record;
  
     str countyId, zipcode;
  
     ;
  
     file = new CommaTextIo("C:\\VendorPostalAddress.csv",'r');
  
     file.inFieldDelimiter(',');
  
     while (file.status() == IO_Status::Ok)
  
     {
  
       record = file.read();
  
       vendTable = VendTable::find(conPeek(record,1));
  
       if (vendTable.RecId)
  
       {
  
         try{
  
         dirParty = DirParty::constructFromCommon(vendTable);
  
         PostalAddress.Street = conPeek(record,2);
  
         PostalAddress.BuildingCompliment = conPeek(record,3);
  
         PostalAddress.City = conPeek(record,4);
  
         PostalAddress.CountryCurrencyCode = conPeek(record,5);
  
         PostalAddress.CountryRegionId = conPeek(record,6);
  
         countyId = conPeek(record,7);
  
         if (Global::strStartsWith(countyId,'~'))
  
         {
  
           countyId = strDel(countyId,1,1);
  
         }
  
         PostalAddress.County = countyId;
  
         //PostalAddress.District = conPeek(record,8);
  
         //PostalAddress.DistrictName = conPeek(record,9);
  
         //PostalAddress.IsLocationOwner = conPeek(record,10);
  
         //PostalAddress.isocode = conPeek(record,11);
  
         PostalAddress.IsPrimary = conPeek(record,12);
  
         PostalAddress.LocationName = conPeek(record,16);
  
         PostalAddress.State = conPeek(record,24);
  
         zipcode = conPeek(record,30);
  
         if (Global::strStartsWith(zipcode,'~'))
  
         {
  
           zipcode = strDel(zipcode,1,1);
  
         }
  
         PostalAddress.ZipCode = zipcode;
  
         PostalAddress.ValidFrom = datetobeginUtcDateTime(1\1\2012, DateTimeUtil::getUserPreferredTimeZone()) ;
  
         PostalAddress.ValidTo = datetobeginUtcDateTime(1\1\2154, DateTimeUtil::getUserPreferredTimeZone()) ;
  
         PostalAddress.Party = vendTable.Party;
  
         if (!dirParty.createOrUpdatePostalAddress(PostalAddress).RecId)
  
           {
  
             info(VendTable.AccountNum);
  
           }
  
         }
  
         catch(Exception::Error)
  
         {
  
           info(VendTable.AccountNum);
  
         }
  
       }
  
     }
  
   }  

Sunday, June 24, 2012

Send and Receive Mail from C# (SMTP and POP)

Today we shall see both sending of mails from a domain and reading mails from a domain.
Some domains wont allow mails to be send from them from an application if no mail is popped from it,ie;read from it. That means , to send a mail we first need to get pop access to the domain.Once we authenticate that we can start sending mails from that domain.
Include the following code bit in any page.
public class Pop3Exception : System.ApplicationException
{
public Pop3Exception(string str)
: base(str)
{
}
};
public class Pop3Message
{
public long number;
public long bytes;
public bool retrieved;
public string message;
};
public class Pop3 : System.Net.Sockets.TcpClient
{
public void Connect(string server, string username, string password)
{
string message;
string response;
Connect(server, 110);
response = Response();
if (response.Substring(0, 3) != "+OK")
{
throw new Pop3Exception(response);
}
message = "USER " + username + "\r\n";
Write(message);
response = Response();
if (response.Substring(0, 3) != "+OK")
{
throw new Pop3Exception(response);
}
message = "PASS " + password + "\r\n";
Write(message);
response = Response();
if (response.Substring(0, 3) != "+OK")
{
throw new Pop3Exception(response);
}
}
private void Write(string message)
{
System.Text.ASCIIEncoding en = new System.Text.ASCIIEncoding();
byte[] WriteBuffer = new byte[1024];
WriteBuffer = en.GetBytes(message);
NetworkStream stream = GetStream();
stream.Write(WriteBuffer, 0, WriteBuffer.Length);
Debug.WriteLine("WRITE:" + message);
}
private string Response()
{
System.Text.ASCIIEncoding enc = new System.Text.ASCIIEncoding();
byte[] serverbuff = new Byte[1024];
NetworkStream stream = GetStream();
int count = 0;
while (true)
{
byte[] buff = new Byte[2];
int bytes = stream.Read(buff, 0, 1);
if (bytes == 1)
{
serverbuff[count] = buff[0];
count++;
if (buff[0] == '\n')
{
break;
}
}
else
{
break;
};
};
string retval = enc.GetString(serverbuff, 0, count);
Debug.WriteLine("READ:" + retval);
return retval;
}
public void Disconnect()
{
string message;
string response;
message = "QUIT\r\n";
Write(message);
response = Response();
if (response.Substring(0, 3) != "+OK")
{
throw new Pop3Exception(response);
}
}
public ArrayList List()
{
string message;
string response;
ArrayList retval = new ArrayList();
message = "LIST\r\n";
Write(message);
response = Response();
if (response.Substring(0, 3) != "+OK")
{
throw new Pop3Exception(response);
}
while (true)
{
response = Response();
if (response == ".\r\n")
{
return retval;
}
else
{
Pop3Message msg = new Pop3Message();
char[] seps = { ' ' };
string[] values = response.Split(seps);
msg.number = Int32.Parse(values[0]);
msg.bytes = Int32.Parse(values[1]);
msg.retrieved = false;
retval.Add(msg);
continue;
}
}
}
public Pop3Message Retrieve(Pop3Message rhs)
{
string message;
string response;
Pop3Message msg = new Pop3Message();
msg.bytes = rhs.bytes;
msg.number = rhs.number;
message = "RETR " + rhs.number + "\r\n";
Write(message);
response = Response();
if (response.Substring(0, 3) != "+OK")
{
throw new Pop3Exception(response);
}
msg.retrieved = true;
while (true)
{
response = Response();
if (response == ".\r\n")
{
break;
}
else
{
msg.message += response;
}
}
return msg;
}
}
Now calling PopMail(),
private static void PopMail()
{
try
{
Pop3 obj = new Pop3();
obj.Connect("pop.rediffmailpro.com", "full@email.address", "password");
ArrayList list = obj.List();
foreach (Pop3Message msg in list)
{
Pop3Message msg2 = obj.Retrieve(msg);
System.Console.WriteLine("Message {0}: {1}",
msg2.number, msg2.message);
break;
}
obj.Disconnect();
}
catch (Pop3Exception pe)
{
System.Console.WriteLine(pe.ToString());
}
catch (System.Exception ee)
{
System.Console.WriteLine(ee.ToString());
}
}
will do the tricks.
No we'll see the sending of mails.For that we use a button click event on our application.
private void _sendButton_Click(object sender, EventArgs e)
{
System.Data.Odbc.OdbcConnection connect = new System.Data.Odbc.OdbcConnection();
...
{
..
}
foreach (DataGridViewRow row in grid.Rows)
{
count++;
if (row.Cells[0].Value != null)
{
if (row.Cells[0].Value.ToString() == "True")
{
..
if (count % 300 == 0)
PopMail();
sendMail(row);
..
}
}
}
MessageBox.Show("Mails sent Successfully");
}
bool sendMail(DataGridViewRow row)
{
MailMessage message = new MailMessage();
string getToAddress = row.Cells[4].Value.ToString();
try
{
if (getToAddress == "")
message.To.Add("default@email.id");
else
message.To.Add(row.Cells[4].Value.ToString());
}
catch (Exception ex)
{
message.To.Add("default@email.id");
}
try
{
message.From = new MailAddress("emailid", "domain");
message.IsBodyHtml = true;
string messageBody = GetMessageBody(row);
message.Body = messageBody;
message.Subject = "Hi";
System.Net.Mail.SmtpClient smtp = new System.Net.Mail.SmtpClient("smtp.rediffmailpro.com");
System.Net.NetworkCredential smtpAuthen =
new System.Net.NetworkCredential("emailid", "password");
smtp.UseDefaultCredentials = false;
smtp.Credentials = smtpAuthen;
smtp.Send(message);
return true;
}
catch (SmtpException se)
{
Console.WriteLine(se.Message);
return true;
}
catch (Exception e)
{
Console.WriteLine(e.Message);
return true;
}
}
In the code you might have noticed that,the PopMail() is called in a loop during limited time interval.That is because,the authentication time expires after sending a couple of mails.So the PopMail is called after sending every 300 mails.

Thursday, June 21, 2012

Add a Segmented Entry Control to a Form [AX 2012]

Add a Segmented Entry Control to a Form [AX 2012]

You can use a segmented entry control to view or update an account number from the chart of accounts. You use the LedgerDimensionAccountController class to provide the actions that are used with this kind of account. For more information about how to add multi-segment account numbers to forms, see Segmented Entry. The following sections describe how to add a data source for a segmented entry control, how to add the control, and then how to add actions.

To Add the Data Source to the Form
  1. In the AOT, expand Forms. Find and expand the form where you want to add a financial account field. Expand the Data Sources node of the form.
  2. Press Ctrl + D to open a second AOT. Expand Data Dictionary, expand Tables, and then click the table that contains the field you want to appear on the form.

    ImportantImportant

    When you bind the field to a segmented entry control, you should verify that the ExtendedDataType property of the field is set to LedgerDimensionAccount. In addition, you should verify that the field is part of a table relation to the DimensionAttributeValueCombination table.

  3. Drag the table to the Data Sources node of the form. The table is added to the form data sources.
To Add the Segmented Entry Control to the Form
  1. Expand the Designs node of the form.
  2. Expand the Data Sources node of the form, expand the table, expand Fields, and then drag the field that represents the multi-segment account number to the Design node of the form. A segmented entry control is added to the form.
    You can also right-click Design, click New Control, click SegmentedEntry, and then populate the DataSource and ReferenceField properties of the control.
To Add Actions to the Segmented Entry Control
  1. Expand the Methods node of the form, right-click ClassDeclaration, and then click View Code. The method opens in the code editor. Add an instance of the LedgerDimensionAccountController class to the form. The following code example adds a declaration for the class.

    X++

    public class FormRun extends ObjectRun
    {
    LedgerDimensionAccountController ledgerDimensionAccountController;
    }

  2. Right-click the Methods node of the form, click Override method, and then click init. The init method opens in the code editor. Create an instance of the LedgerDimensionAccountController class and specify the data source and field that you want to associate with the segmented entry control.
    The following code example instantiates the class. Notice how the parameters specify the LedgerJournalTrans table as the data source and LedgerDimension as the field.


    X++

    public void init()

    {
    super();

    ledgerDimensionAccountController = LedgerDimensionAccountController::construct(LedgerJournalTrans_DS, fieldstr(LedgerJournalTrans, LedgerDimension));
    }

  3. Expand the Data Sources node of the form, expand the data source table, expand Fields, and then expand the field that you want to appear on the form. Right-click Methods, click Override method, and then click resolveReference. The method opens in the code editor. Replace the existing code in the method with a call to the resolveReference method of the LedgerDimensionAccountController class.
    The following code example overrides the resolveReference method of the field. Notice how comments are used to remove the existing code.


    X++

    public Common resolveReference(FormReferenceControl _formReferenceControl)

    {
    //Common ret;

    //ret = super(_formReferenceControl);

    //return ret,

    return ledgerDimensionAccountController.resolveReference();
    }

  4. Expand the Design node of the form, expand the segmented entry control that you added, right-click Methods, click Override method, and then click jumpRef. The jumpRef method opens in the code editor. Add a call to the jumpRef method of the LedgerDimensionAccountController class.
    The following code example shows how to override the jumpRef method of the control.


    X++

    public void jumpRef()

    {
    ledgerDimensionAccountController.jumpRef();

    super();
    }

  5. Right-click Methods of the segmented entry control, click Override method, and then click loadAutoCompleteData. The loadAutoCompleteData method opens in the code editor. Add a call to the loadAutoCompleteData method of the LedgerDimensionAccountController class.
    The following code example shows how to override the loadAutoCompleteData method of the control. Notice how the loadAutoCompleteData method of the LedgerDimensionAccountController uses the input parameter of the control method.


    X++

    Public void loadAutoCompleteData(loadAutoCompleteDataEventArgs _e)

    {
    super(_e);

    ledgerDimensionAccountController.loadAutoCompleteData(_e);
    }

  6. Right-click the Methods node of the segmented entry control, click Override method, and then click loadSegments. The loadSegments method opens in the code editor. Add a call to the parmControl, parmDimensionAccountStorageUsage, and loadSegments methods of the LedgerDimensionAccountController class.
    The following code example overrides the loadSegments method of the control. Notice the use of the parmControl method. You use this method to bind the instance of the LedgerDimensionAccountController class to the segmented entry control.


    X++

    public void loadSegments()

    {
    super();

    ledgerDimensionAccountController.parmControl(this);
    ledgerDimensionAccountController.loadSegments();
    }

  7. Right-click the Methods node of the segmented entry control, click Override method, and then click segmentValueChanged. The segmentValueChanged method opens in the code editor. Add a call to the segmentValueChanged method of the LedgerDimensionAcccountController class.
    The following code example shows how to override the segmentValueChanged method of the control. Notice how the segmentValueChanged method of the LedgerDimensionAccountController class uses the input parameter of the control method.


    X++

    public void segmentValueChanged(SegmentValueChangedEventArgs _e)

    {
    super(_e);

    ledgerDimensionAccountController.segmentValueChanged(_e);
    }

  8. Right-click the Methods node of the segmented entry control, click Override method, and then click validate. The validate method opens in the code editor. Add a call to the validate method of the LedgerDimensionAccountController class. The following code examples shows how to override the validate method of the control.


    X++

    public boolean validate()

    {
    boolean ret;

    ret = super();

    ret = ledgerDimensionAccountController.validate() && ret;
        
    return ret;
    }

  9. Save the form and close the code editor.

Business Logic Report - AX

Dynamics Ax – Simple SSRS report example by using Ax-Query and Ranges


In this report I am going to use the Ax-Query in the SSRS business logic and report will be generated by using SSRS Business logic.

For this report

1) Define the sample Ax Query in Dynamics Ax as follows

2) In the above SampleCustomers query I had defined the ranges for the Name Field.

3) Now go to VS-2008 Create New Project for Dynamics Ax SSRS reports.

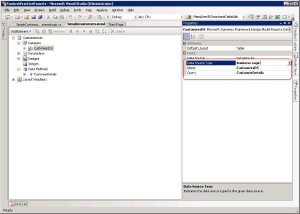
4) Open the report from the Solution explorer and Add the new DataMethod to the report as follows 

5) Rename the DataMethod and do the code as follows

[DataMethod(), AxSessionPermission(SecurityAction.Assert)]

public static DataTable CustomerDetails(String custAccName)

{

DataTable custDataTable = new DataTable();

IDictionary<string, object> ranges = new Dictionary<string,object>();

DataRow customersRow;

DataTable dtASCAllRows = new DataTable("Customers");

DataView dvASC = new DataView();

//Defining ranges

object[] rangeName = new object[] { "CustTable.Name" };

object[] rangeValue = new object[] { custAccName };

ranges.Add(rangeName[0].ToString(), rangeValue[0]);

// execute query – "SampleCustomers" is our Ax Query

dtASCAllRows = AxQuery.ExecuteQuery((String.Format("Select * from {0}", "SampleCustomers"))

, ranges);

dvASC.Table = dtASCAllRows;

custDataTable.Columns.Add("AccountNum", typeof(string));

custDataTable.Columns.Add("AccountName", typeof(string));

custDataTable.Columns.Add("CustGroup", typeof(string));

// Loop for fetching data for every record

for (int intLoopCounter = 0;

intLoopCounter < dvASC.Count; intLoopCounter++)

{

customersRow = custDataTable.NewRow();

customersRow["AccountNum"] =Convert.ToString(dvASC[intLoopCounter]["AccountNum"]);

customersRow["AccountName"] =Convert.ToString(dvASC[intLoopCounter]["Name"]);

customersRow["CustGroup"] =Convert.ToString(dvASC[intLoopCounter]["CustGroup"]);

custDataTable.Rows.Add(customersRow);

}

return custDataTable;

}

6) Define the new Dataset for the report. 

       7) Assign the properties of the dataset as follows and Map our DataMethod(CustomerDetails) to the Query Property of the DataSet.


Save the solution. Drag and drop the Dataset to the Designs node of the report.

9) Now we can see the preview of the report by using the Customer name as filter condition.

Product Information Management AX 20

Understanding the Product structure:

Product type

· Item type - This option will be selected if the product is an inventoried product

· Service type - This option will be selected if the product is a non-inventoried product

Product sub type

· Product master - Products of this sub-type must have a product dimension group that specifies the product dimensions that are active for the product (color, size, and configuration)

o Configuration technology

§ Predefined variant - This type should be chosen if the product will not be configured, but simply rely on the user’s choice of Color, and/or Size, and/or Configuration for each transaction

§ Dimension-based configuration - This type should be chosen if the user will build a configurable BOM that relies on configuration rules to build the Config ID and the BOM lines. (This technology may only be chosen if Configuration is active on the Product dimension group selected for the product)

§ Rule-based configuration - This type should be chosen if the product will use Product builder

§ Constraint-based configuration - This type should be chosen if the product will use the new AX 2009 Constraint based product configuration method. (This technology may only be chosen if Configuration is active and is the lone Product dimension active for the Product dimension group selected for the product)

· Product - Products of this sub-type do NOT have any product dimensions, and therefore do not have a product dimension group

· Product variant - A large amount of information may be maintained at the Product master level, including, but not limited to:

o Product dimensions

o Images

o Product categories

o Product attributes

o Unit conversions
For Product master products, Product dimensions and Product variants are extremely important. Both may be managed from menu items in the ribbons section of the Products form:

Dimensions

· Product dimensions: Color, Size, Configuration

· Storage dimensions: Site, Warehouse, Location, Pallet ID

· Tracking dimensions: Batch number, Serial number

Release product

Once product variants have been created at the instance level, they must be released to individual companies before transactions may be performed in the respective company. Variants may be released from any of the Products forms (All, Distinct, Product masters), or from the Product variants form by clicking Release products in the ribbon section of the form.

Tech part (Data model)

AX 2012 Item AIF Web Service (InventItemService)

Table Name

Table Description

EcoResProduct

The EcoResProduct table stores products and is the base table in the products hierarchy.

EcoResProductMaster

The EcoResProductMaster table stores product masters.

EcoResProductIdentifier

The EcoResProductIdentifier table contains a product identification that is available for users.

EcoResDistinctProduct

The EcoResDistinctProduct table stores products.

EcoResDistinctProductVariant

The EcoResDistinctProductVariant table stores product variants.

EcoResProductDimensionGroup

The EcoResProductDimensionGroup table contains information about a dimension group.

EcoResProductDimensionGroupProduct

The EcoResProductDimensionGroupProduct table stores information about relationships between products and dimension groups.

EcoResColor

The EcoResColor table stores color names.

EcoResSize

The EcoResSize table stores size names.

EcoResConfiguration

The EcoResConfiguration table stores configuration names.

EcoResProductMasterColor

The EcoResProductMasterColor table stores information about colors assigned to product masters.

EcoResProductMasterSize

The EcoResProductMasterSize table stores information about sizes that are assigned to product masters.

EcoResProductMasterConfiguration

The EcoResProductMasterConfiguration table stores information about configurations assigned to product masters.

EcoResProductVariantColor

The EcoResProductVariantColor table stores information about the colors that are assigned to product variants.

EcoResProductVariantSize

The EcoResProductVariantSize table stores information about the sizes that are assigned to product variants.

EcoResProductVariantConfiguration

The EcoResProductVariantConfiguration table stores information about the configurations that are assigned to product variants.

EcoResProductMasterDimensionValue

The EcoResProductMasterDimensionValue table is the base table in the product model dimension hierarchy.

EcoResProductVariantDimensionValue

The EcoResProductVariantDimensionValue table is the base table in the product variant dimension hierarchy.

EcoResProductDimensionAttribute

The EcoResProductDimensionAttribute table contains definitions of product dimension attributes (categories).

EcoResInstanceValue

The EcoResInstanceValue table contains the definitions of the instances of the components or products.

EcoResProductInstanceValue

The EcoResProductInstanceValue table contains definitions of values for the instances of attributes of a product.

InventTable

The InventTable table contains information about items.

InventTableModule

The InventTableModule table contains information about purchase, sales, and inventory specific settings for items.

InventItemLocation

The InventItemLocation table contains information about items and the related warehouse and counting settings. The settings can be made specific based on the items configuration and vary from warehouse to warehouse.

InventItemSalesSetup

The InventItemSalesSetup table contains the default settings for items, such as site and warehouse. The values are related to sales settings.

InventItemInventSetup

The InventItemInventSetup table contains the default settings for items, such as site and warehouse. The values are related to inventory settings.

InventItemPurchSetup

The InventItemPurchSetup table contains the default settings for items, such as site and warehouse. The values are related to purchase settings.

InventItemSetupSupplyType

The InventItemSetupSupplyType table contains information about the sourcing of items.

InventDim

The InventDim table contains values for inventory dimensions.

InventDimCombination

The InventDimCombination table contains variants of items. The variants are created as product variants that are based on product dimensions such as size, color, and configuration. These variants are replicated to the legal entity.

For extended info use the below articles to import\integrate Products using AIF services. 

http://blogs.msdn.com/b/dynamicsaxscm/archive/2011/07/06/product-item-data-management-services.aspx
http://blogs.msdn.com/b/axsupport/archive/2012/04/04/importing-products-into-ax-2012.aspx

http://ax2012exceldataimport.blogspot.in/2012/01/dynamics-ax-2012-products-import-using.html

Creating Vendors thru X++ in AX 2012

1.

//Create party for the vendor

public void createParty(VendorRequestCreate          _vendorRequestCreate)

{

    ;

if(_vendorRequestCreate.DirPartyType        == DirPartyBaseType::Person)

    {

        dirPerson.Name                          = _vendorRequestCreate.VendorName;

        dirPerson.NameAlias                     = _vendorRequestCreate.FirstName;

        dirPerson.NameSequence                  = dirNameSequence::find('First Last').RecId;

        dirPerson.insert();

        dirPersonName.FirstName                 = _vendorRequestCreate.FirstName;

        dirPersonName.MiddleName                = _vendorRequestCreate.MiddleName;

        dirPersonName.LastName                  = _vendorRequestCreate.LastName;

        dirPersonName.ValidFrom                 = DateTimeUtil::newDateTime(systemDateGet(),str2time ('00:00:00'),DateTimeUtil::getUserPreferredTimeZone());

        dirPersonName.ValidTo                   = DateTimeUtil::maxValue();

        dirPersonName.Person                    = dirPerson.RecId;

        dirPersonName.insert();

        dirParty                                = new DirParty(dirPerson);

    }

else

    {

        dirOrganisation.Name                    = _vendorRequestCreate.VendorName;

        dirOrganisation.NameAlias               = _vendorRequestCreate.FirstName;

        dirOrganisation.LanguageId              = 'EN-US';

        dirOrganisation.KnownAs                 = _vendorRequestCreate.VendorName;

        dirOrganisation.PhoneticName            = _vendorRequestCreate.VendorName;

        dirOrganisation.insert();

        dirParty                                = new DirParty(dirOrganisation);

    }

}

2.

//Create vendor and associate with vendor

public void convertToVendor(VendorRequestCreate          _vendorRequestCreate)

{

    VendorRequestCreate                  vendorRequestCreate = VendorRequestCreate::find(_vendorRequestCreate.VendorNo,true);

    ;

if(_vendorRequestCreate.DirPartyType    == DirPartyBaseType::Person)

        vendTable.Party         = dirPerson.RecId;

else

        vendTable.Party         = dirOrganisation.RecId;

ttsBegin;

    vendTable.AccountNum    = NumberSeq::newGetNum(VendParameters::numRefVendAccount()).num();

ttsCommit;

if(vendTable.AccountNum == '')

        vendTable.AccountNum= int2str(_vendorRequestCreate.VendorNo);

    vendTable.Currency      = _vendorRequestCreate.CurrencyCode;

    vendTable.VendGroup     = _vendorRequestCreate.VendGroupId;

    vendTable.PaymTermId    = _vendorRequestCreate.PaymTermId;

    vendTable.DefaultDimension = _vendorRequestCreate.DefaultDimension;

    vendTable.OneTimeVendor = _vendorRequestCreate.OneTimeSupplier;

    vendTable.PaymMode      = _vendorRequestCreate.PaymMode;

    vendTable.BankAccount   = _vendorRequestCreate.BankAccount;

    vendTable.WI_Remarks    = _vendorRequestCreate.Remarks;

    vendTable.WI_DepartmentEmail = _vendorRequestCreate.DepartmentEmail;

    vendTable.insert();

    this.createPostalAddress(_vendorRequestCreate);

    this.createCommAddress(_vendorRequestCreate);

    this.createBankDetails(_vendorRequestCreate,vendTable.AccountNum);

    this.createContact(_vendorRequestCreate,vendTable.Party);

if(vendTable.RecId)

    {

        vendorRequestCreate.VendAccount = vendTable.AccountNum;

        vendorRequestCreate.update();

        info(strFmt('Vendor %1 has been successfully created',vendTable.AccountNum));

    }

}

3.

//Create postal address

public void createPostalAddress(VendorRequestCreate          _vendorRequestCreate)

{

    VendorRequestAddress             vendorRequestAddress;

    DirPartyPostalAddressView           dirPartyPostalAddressView;

    ;

select Addressing, LogisticsAddressCity, LogisticsAddressCountryRegionId, LogisticsAddressStateId,

            LogisticsAddressZipCodeId from vendorRequestAddress

where vendorRequestAddress.WI_VendorRequestCreate       == _vendorRequestCreate.RecId;

// Create postal address

if(dirPerson.RecId || dirOrganisation.RecId)

    {

        dirPartyPostalAddressView.LocationName                  = 'Primary business';

        dirPartyPostalAddressView.Address                       = vendorRequestAddress.Addressing;

        dirPartyPostalAddressView.City                          = vendorRequestAddress.LogisticsAddressCity;

        dirPartyPostalAddressView.ZipCode                       = vendorRequestAddress.LogisticsAddressZipCodeId;

        dirPartyPostalAddressView.State                         = vendorRequestAddress.LogisticsAddressStateId;

        dirPartyPostalAddressView.Street                        = vendorRequestAddress.Addressing;

//dirPartyPostalAddressView.Street                        = 'Dover Street';

//dirPartyPostalAddressView.StreetNumber                  = '123';

        dirPartyPostalAddressView.CountryRegionId               = vendorRequestAddress.LogisticsAddressCountryRegionId;

        dirParty.createOrUpdatePostalAddress(dirPartyPostalAddressView);

    }

}

4.

//Create communication details

public void createCommAddress(VendorRequestCreate          _vendorRequestCreate)

{

    VendorRequestCommunication       vendorRequestCommunication;

    ;

select Phone1, Phone2, Email, Fax from vendorRequestCommunication

where vendorRequestCommunication.WI_VendorRequestCreate == _vendorRequestCreate.RecId;

//Phone 1

if(vendorRequestCommunication.Phone1 != '' && vendTable.Party != 0)

    {

        logisticsLocation.clear();

        logisticsLocation   = LogisticsLocation::create('Phone', NoYes::No);

        dirPartyContactInfoView.LocationName                = 'Primay Phone 1';

        dirPartyContactInfoView.Locator                     = vendorRequestCommunication.Phone1;

        dirPartyContactInfoView.Type                        = LogisticsElectronicAddressMethodType::Phone;

        dirPartyContactInfoView.Party                       = vendTable.Party;

        dirPartyContactInfoView.IsPrimary                   = NoYes::Yes;

        dirParty.createOrUpdateContactInfo(dirPartyContactInfoView);

    }

//Phone 2

if(vendorRequestCommunication.Phone2 != '' && vendTable.Party != 0)

    {

        logisticsLocation.clear();

        logisticsLocation   = LogisticsLocation::create('Phone', NoYes::No);

        dirPartyContactInfoView.LocationName                = 'Primay Phone 2';

        dirPartyContactInfoView.Locator                     = vendorRequestCommunication.Phone2;

        dirPartyContactInfoView.Type                        = LogisticsElectronicAddressMethodType::Phone;

        dirPartyContactInfoView.Party                       = vendTable.Party;

        dirPartyContactInfoView.IsPrimary                   = NoYes::No;

        dirParty.createOrUpdateContactInfo(dirPartyContactInfoView);

    }

//Email

if(vendorRequestCommunication.Email != '' && vendTable.Party != 0)

    {

        logisticsLocation.clear();

        logisticsLocation   = LogisticsLocation::create('Phone', NoYes::No);

        dirPartyContactInfoView.LocationName                = 'Primay Email';

        dirPartyContactInfoView.Locator                     = vendorRequestCommunication.Email;

        dirPartyContactInfoView.Type                        = LogisticsElectronicAddressMethodType::Email;

        dirPartyContactInfoView.Party                       = vendTable.Party;

        dirPartyContactInfoView.IsPrimary                   = NoYes::Yes;

        dirParty.createOrUpdateContactInfo(dirPartyContactInfoView);

    }

//Fax

if(vendorRequestCommunication.Fax != '' && vendTable.Party != 0)

    {

        logisticsLocation.clear();

        logisticsLocation   = LogisticsLocation::create('Phone', NoYes::No);

        dirPartyContactInfoView.LocationName                = 'Primay Fax';

        dirPartyContactInfoView.Locator                     = vendorRequestCommunication.Fax;

        dirPartyContactInfoView.Type                        = LogisticsElectronicAddressMethodType::Fax;

        dirPartyContactInfoView.Party                       = vendTable.Party;

        dirPartyContactInfoView.IsPrimary                   = NoYes::Yes;

        dirParty.createOrUpdateContactInfo(dirPartyContactInfoView);

    }

}

5.

//Create bank details for the vendor

private void createBankDetails(WI_VendorRequestCreate          _vendorRequestCreate,

                               VendAccount                     _vendAcc)

{

    VendBankAccount         vendBankAccount;

    LogisticsLocation       lLogisticsLocation;

    LogisticsPostalAddress  logisticsPostalAddress;

    ;

ttsBegin;

    lLogisticsLocation.Description      = _vendorRequestCreate.FirstName;

    lLogisticsLocation.insert();

    logisticsPostalAddress.Street       = _vendorRequestCreate.VendBankAddress;

    logisticsPostalAddress.Address      = _vendorRequestCreate.VendBankAddress;

    logisticsPostalAddress.Location     = lLogisticsLocation.RecId;

    logisticsPostalAddress.insert();

    vendBankAccount.AccountID           = subStr(_vendorRequestCreate.BankAccount,1,10);

    vendBankAccount.Name                = _vendorRequestCreate.BankAccount;

    vendBankAccount.AccountNum          = _vendorRequestCreate.BankAccountNum;

    vendBankAccount.VendAccount         = _vendAcc;

    vendBankAccount.CurrencyCode        = _vendorRequestCreate.CurrencyCode;

    vendBankAccount.BankGroupID         = BankAccountTable::find(vendBankAccount.AccountID).BankGroupId;

    vendBankAccount.Location            = lLogisticsLocation.RecId;

    vendBankAccount.WI_BeneficiaryName  = _vendorRequestCreate.BeneficiaryName;

    vendBankAccount.initFromBankGroup(BankGroup::find(vendBankAccount.BankGroupID));

    vendBankAccount.insert();

ttsCommit;

}

6.

//Create contact for the vendor

private void createContact(VendorRequestCreate       _vendorRequestCreate,

                           RefRecId                     _partyId)

{

    ContactPerson           contactPerson;

    DirPersonName           lDirPersonName;

    DirPerson               lDirPerson;

    DirParty                lDirParty;

    LogisticsLocation       lLogisticsLocation;

    DirPartyContactInfoView             lDirPartyContactInfoView;

    ;

//Create party for Contact

    lDirPerson.Name                          = _vendorRequestCreate.ContactPersonName;

    lDirPerson.NameAlias                     = _vendorRequestCreate.ContactPersonName;

    lDirPerson.NameSequence                  = dirNameSequence::find('First Last').RecId;

    lDirPerson.insert();

    lDirPersonName.FirstName                 = _vendorRequestCreate.ContactPersonName;

//lDirPersonName.MiddleName                = _vendorRequestCreate.ContactPersonName;

//lDirPersonName.LastName                  = _vendorRequestCreate.LastName;

    lDirPersonName.ValidFrom                 = DateTimeUtil::newDateTime(systemDateGet(),str2time ('00:00:00'),DateTimeUtil::getUserPreferredTimeZone());

    lDirPersonName.ValidTo                   = DateTimeUtil::maxValue();

    lDirPersonName.Person                    = lDirPerson.RecId;

    lDirPersonName.insert();

    lDirParty                                = new DirParty(lDirPerson);

//Create contact and associate with party

    contactPerson.ContactForParty           = vendTable.Party;

    contactPerson.Party                     = lDirPerson.RecId;

    contactPerson.insert();

//Create contact number

if(_vendorRequestCreate.ContactPersonNo != '')

    {

        lLogisticsLocation.clear();

        lLogisticsLocation                  = LogisticsLocation::create('Phone', NoYes::No);

        lDirPartyContactInfoView.LocationName                = 'Primay Phone';

        lDirPartyContactInfoView.Locator                     = _vendorRequestCreate.ContactPersonNo;

        lDirPartyContactInfoView.Type                        = LogisticsElectronicAddressMethodType::Phone;

        lDirPartyContactInfoView.Party                       = contactPerson.Party;

        lDirPartyContactInfoView.IsPrimary                   = NoYes::Yes;

        lDirParty.createOrUpdateContactInfo(lDirPartyContactInfoView);

    }

}

How to identify the user that was used to change an object from AOT in AX2012

Get the object name for which we need to track these (user and date&time) information's. Login to SQL Server Management Studio an...